Email Setup
There are three parts to setting up your email. This takes about about 5 minutes.
You will find it much easier to print these instructions before continuing.
|
|
Part 1. Setup an Email Account on the Server
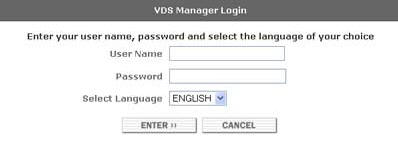
Log in to your web account using the following URL: You should see a screen like this. Enter your username and password.
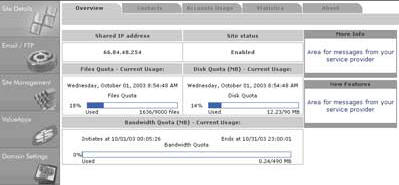
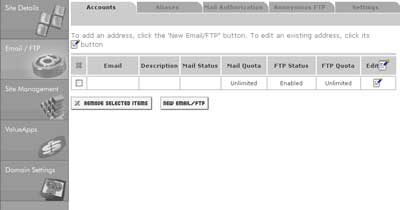
Then, you will see the main screen (below). Click on the Email/FTP tab on the left.
Click the New Email/FTP button near the center
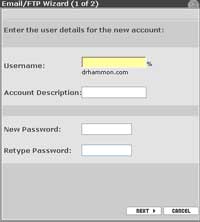
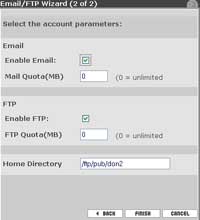
In this window...
Enter the following information:
Click NEXT to continue
Accept the following information information similar to the screen below:
Click the Finish button. You're done with Part 1. Next go to Part 2.
Part 2. Setup an Email Account on your ComputerThese instructions are for MS Outlook 2002. Your email program may be similar to Outlook 2002 (Outlook 2000, Front Page Express, etc.) so these instructions may assist you too.
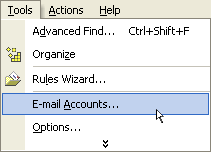
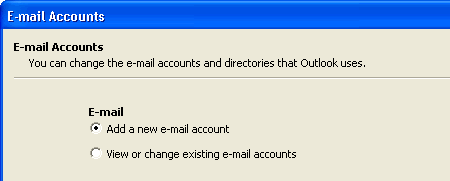
Start Outlook. On the menu bar at the top, select Tools, then select Accounts. Create a new account.
Click Next.
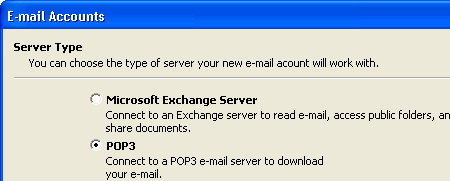
Click Next.
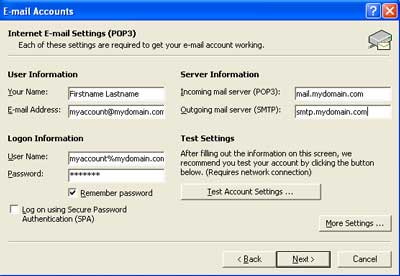
User Information: Password - Enter the password for the account. Server Information:
Click Next. Click Finish.
Part 3. Adjust the Email Settings on your Computer
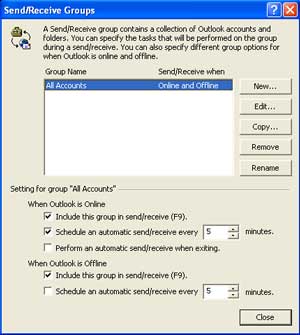
Part 3 adjusts your email settings on your computer to match advanced features on your hosting account. Please follow the steps below to setup your computer to send/receive email automatically every 5 to 10 minutes.
This step is a necessary to "workaround" advanced Spam blocking features that come with your account. If you don't follow this part, you may get a "Relaying denied" error message when you try to send email.
These instructions are for MS Outlook 2002. Your email program may be similar to Outlook 2002 (Outlook 2000, Front Page Express, etc.) so these instructions may assist you too.
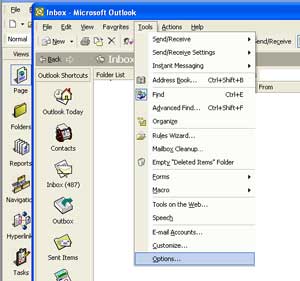
Start Outlook. On the menu bar at the top, select Tools, then select Options.
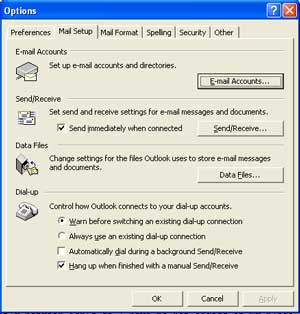
Click on the Mail Setup tab at the top.
Click on the Send/Receive button on the middle right
Adjust the settings to "Schedule an automatic send/receive every 5 minutes"
|